

Settings on an Amplifier and how to set them
April 6, 2019 by Coleman Thedinger

Even though you’re probably excited to start bumping your new car stereo right away, you should take some time to get your amp tuned properly first. It makes all the difference in the world.
Dialing in the right settings isn’t just going to ensure that you’re hearing the best audio quality possible, but it can also help protect your equipment and help to prevent distortion.
The main settings to adjust on your amplifier are the gain and the crossovers. There are different ways to go about this and various tools that can come in handy. You can try to do this by ear, but having a multimeter makes it a lot more accurate.
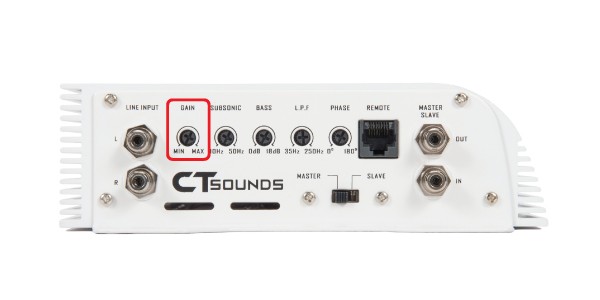
Setting the Gain Control on Your Amplifier
Even though it may seem like it functions in the same way, the gain is not the volume knob. It’s important to keep this in mind, it’s a small nuance but it makes a big difference in how you approach things.
Another common misconception is that if you only dial up your gain part way, you’re leaving power on the table and not taking advantage of your amp. It’s not about pushing everything to the max, because that can result in distortion and can even damage to your equipment. It’s a matter of finding the perfect level of gain to match your setup. You aren’t missing out if you must dial it back a bit, you’re improving your sound quality.
- Using a Multimeter
Start by making sure that the settings on your deck are flat. Ensure that your treble, bass boost, and any other EQ settings are set to neutral. Now that you’ve got the groundwork laid out, it’s time for a bit of math in order to figure out how many volts we’re aiming for.
Your desired voltage is going to be equal to the square root of resistance times power. If you have4-ohm speakers and your power is 150w, then you just need to calculate the square root of 4x150. In this example, we’re aiming for a voltage of 24.49.
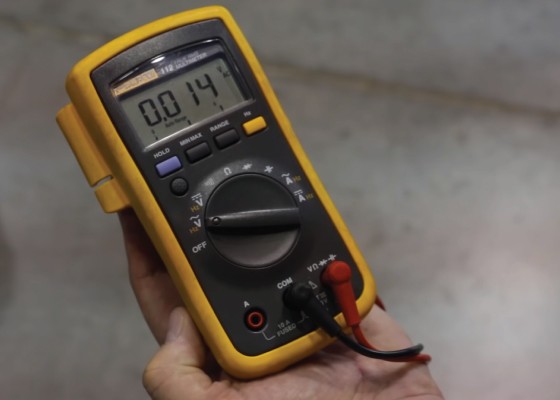
Set your multimeter to AC volts and connect the leads from your multimeter to the speaker outputs on your amplifier. You’ll see the measurement on the screen, and all you’ve got to do is slowly turn the gain dial (you may need a screwdriver for this) until it matches your voltage.
-
By Ear
If you don’t have a multimeter, a lot of people will just set their gain by ear. Start by turning your volume to 0 on your deck, and turning your gain dial all the way down. Next, get some source audio going. You can use a special track that’s meant for tuning, or just play some of your favorite music. Turn the volume up to around70%. Next, start to slowly turn up your gain until you hear clipping/distortion, then turn it back down a little bit.
You’ll likely need to turn the volume on your stereo back down for a normal listening level, and this should give you plenty of leeway to avoid any distortion.
Regardless of which method you use, if you’re having any issues, just turn your gain down slightly. Make sure you test it with some demanding songs, like something with a lot of bass, especially a big bass drop, to make sure that your settings can handle anything you throw at them.

Crossover Basics and How to Set Them

Crossovers are responsible for sending different frequencies to the correct speakers. This ensures that your lows, mids, and highs are all coming through as clear as possible, and each speaker can focus on what it does best

- High pass crossover: This allows any frequencies that are above the specified value to pass through to the speakers. The higher that this is set, the less mids and bass that you’ll hear. This is used for your tweeters.
- Low pass crossover: This works the same as the high pass, except it only lets lower frequencies through, rather than higher ones. This is used for your subwoofer, to ensure that it isn’t burdened with mids and highs and allows it to focus entirely on bass.
- Band Pass Crossover: A band pass will only accept frequencies from within a set range. You use this for the mids to block out the highest and lowest frequencies.
- The Slope: This setting determines how abruptly the volume diminishes once you’ve passed the crossover point. Rather than having it hit a brick wall and cut off abruptly, you can have it diminish gradually and blend in more. A 6 dB per octave slope is more gradual than a 24 dB per octave slope.
The exact crossover points that you decide on will depend on your gear because there isn’t a set-in-stone answer to this. Check the specs of your subwoofer and your other speakers and see where they each start to peter off and set your crossover points accordingly. You want to make sure there aren’t any frequencies in-between that aren’t accounted for.
If you’re just looking for a rough idea of where to set your crossovers, you can start with a low pass at 80Hz, which is the THX standard. A bandpass at 80 Hz will cover everything above that, up to a high pass at 5000 Hz will keep your highs bright and crisp.
Final Thoughts
Don’t be afraid to experiment and see what sounds best to you. There are so many variables at play, and there’s no substitution for what your ears are hearing. When it’s all said and done, you are the authority on what sounds best in your car.

THANK YOU FOR READING OUR BLOG!
TOP SELLING CT SERIES AMPLIFIERS
CT-80.4D // 440 Watts RMS 4-Channel Car Audio Amplifier
$149.99
CT-700.1D // 700 Watts RMS Monoblock Car Audio Amplifier
$139.99

CT-1000.1D // 1000 Watts RMS Monoblock Car Audio Amplifier
$159.99
CT-1500.1D // 1500 Watts RMS Monoblock Car Audio Amplifier
$199.99